
As per usual with Apple’s proprietary apps, however, Clips doesn’t come with an instruction manual. Even though it is pretty intuitive, there may be some things that aren’t readily obvious. To help, we’ve prepared an easy-to-follow guide on how to use Apple Clips so you can jump straight into making awesome clips.
Check out our take on Apple Clips 2.0 and all the new things it brings for the iPhone X.
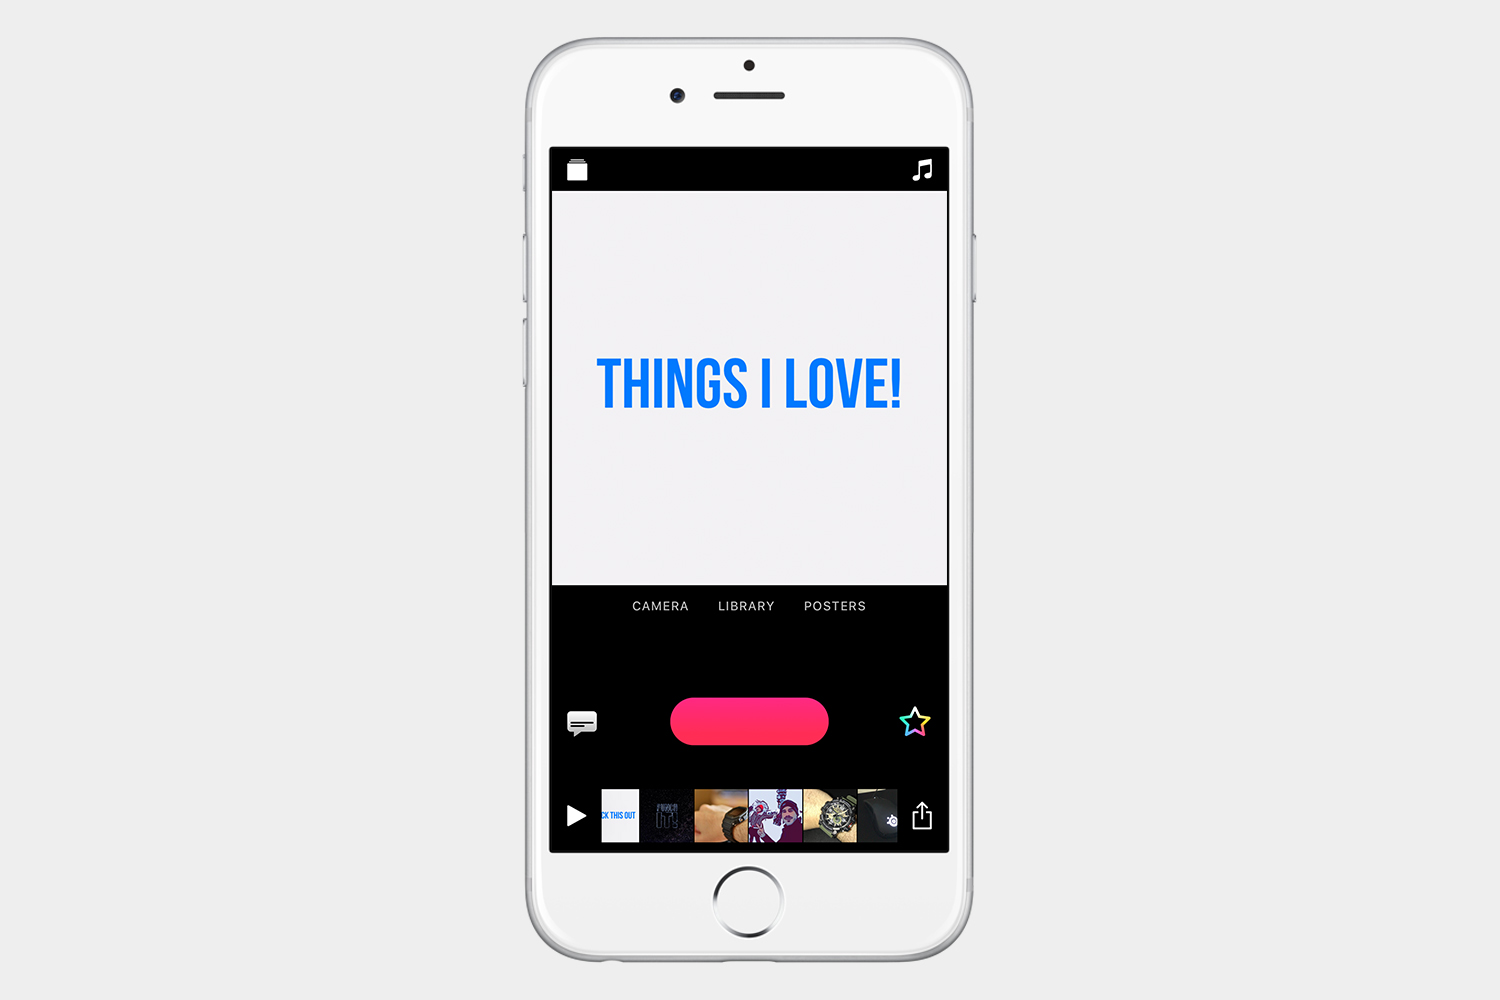
The interface

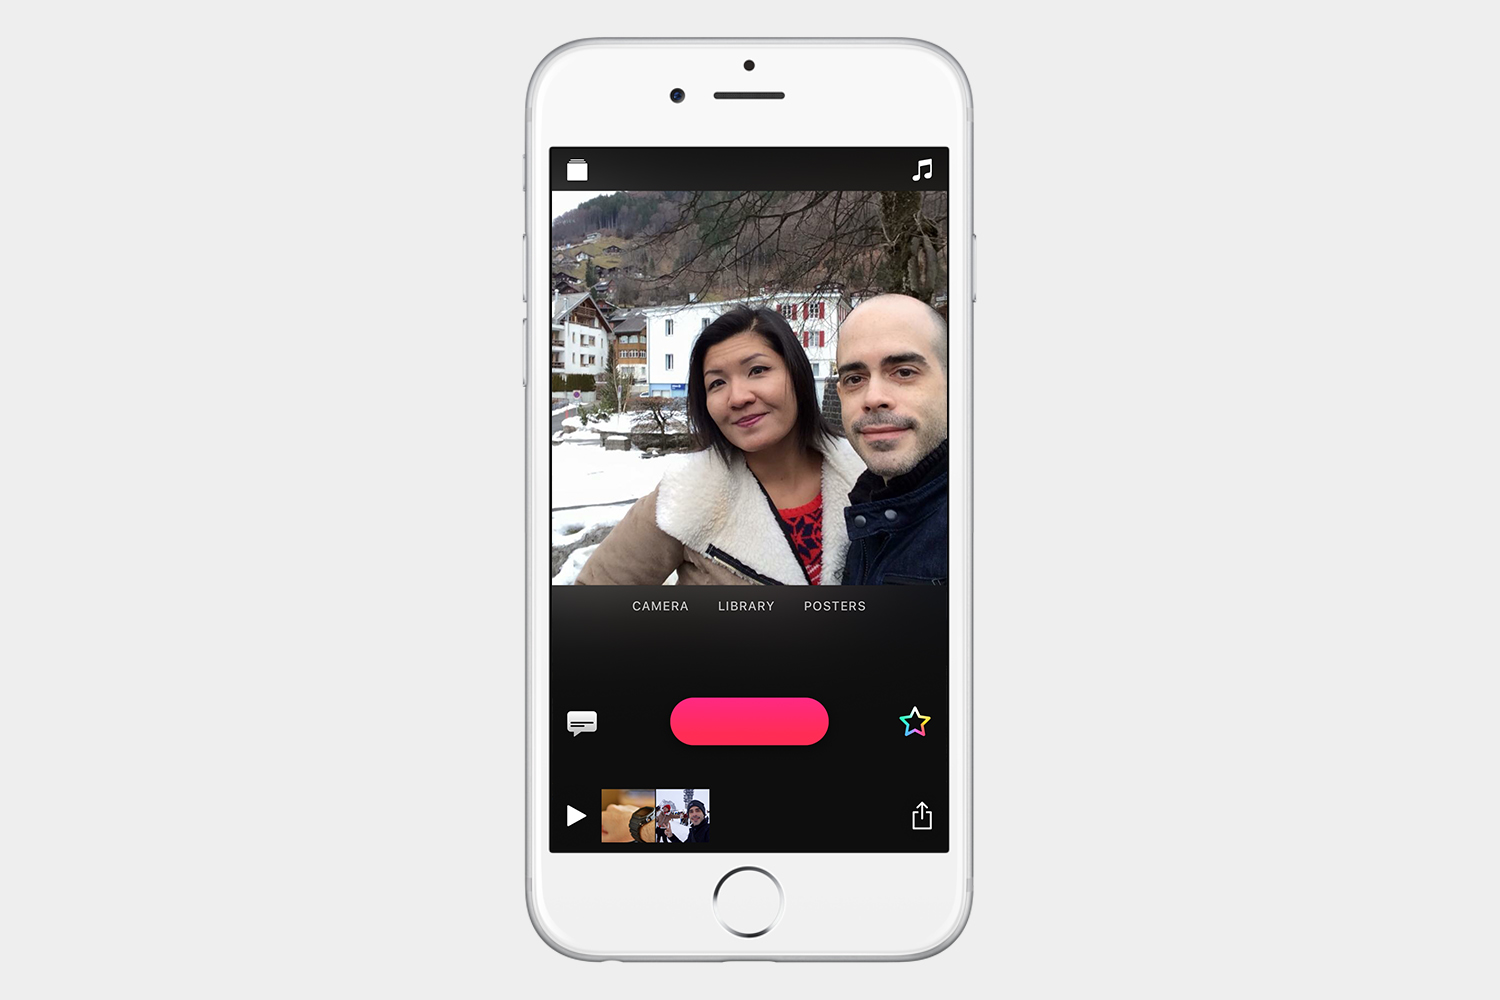
When you open Clips for the first time, it will default to the camera. Apple wants you to make small video clips that will be stitched together at the end. If you’ve ever shared a story on Facebook or Instagram, then you’re already familiar with this concept.
If you’re an iPhone X user, you will see an additional feature called Scenes before the Camera option.
You can also switch from camera to the library in case you want to start adding pictures from there, or you can use posters to insert title slides in your video. Don’t worry because we will show you how to use posters later on.
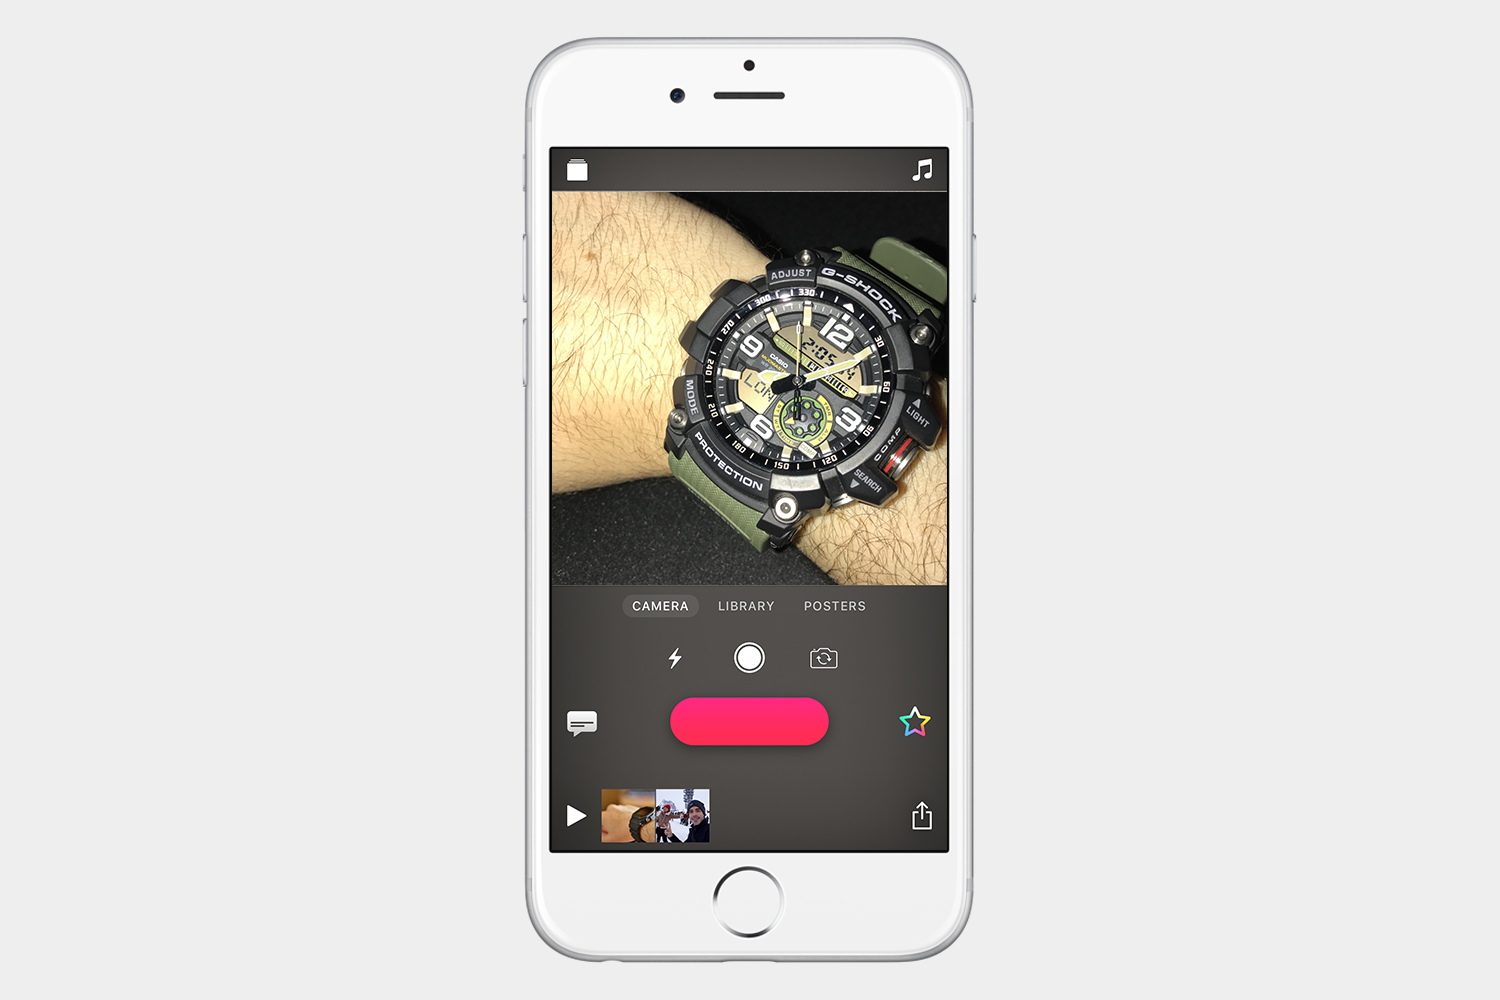
It doesn’t matter what you share — whether it’s a video, posters, or photos — you have to hold the big red button to record it. Once you’ve finished recording, Clips will add it to the timeline. You can choose to record a video, take a photo, or add a video or photo from your library. Regardless of what you add, you have to hold the red button to record it and tell Clips how long to play the video or showcase the photo for.
Directly above the big red button, you will see three icons. The icon on the left is the flash icon, tap it to turn the flash on or off. You’ll see the camera shutter button in the center which you can tap to take a picture. The icon on the right is to switch the camera so you can toggle between the front-facing camera or the primary camera on the back of your iPhone.

On the left side of the red button you’ll find the Live Titles icon and on the right is the star icon which opens up the filters, labels, stickers, and emojis.

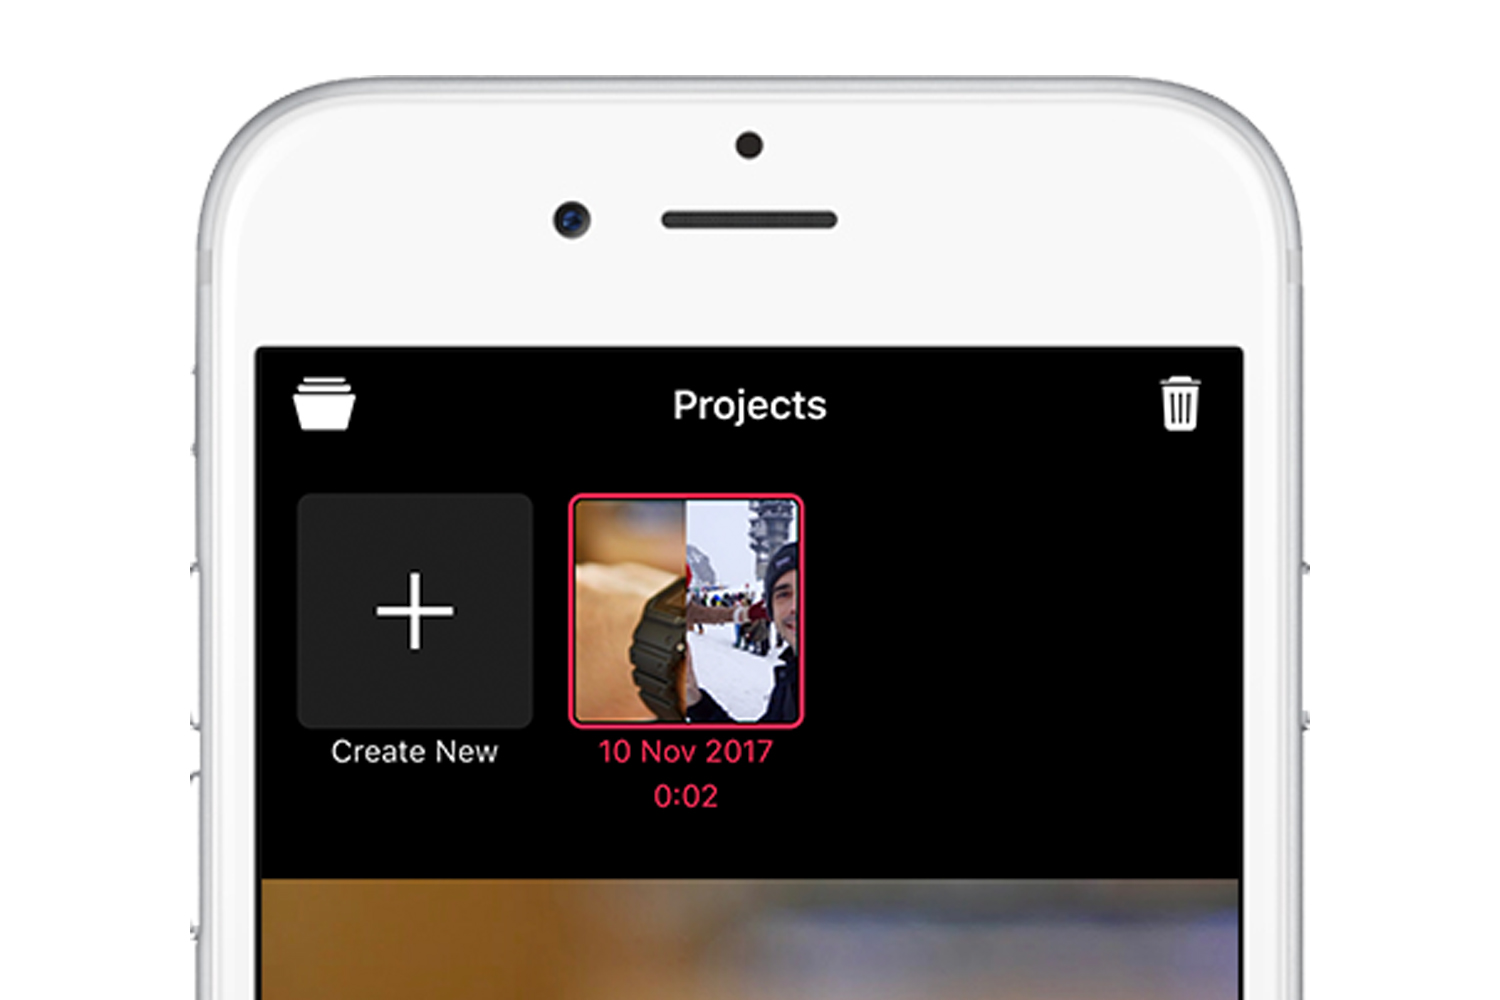
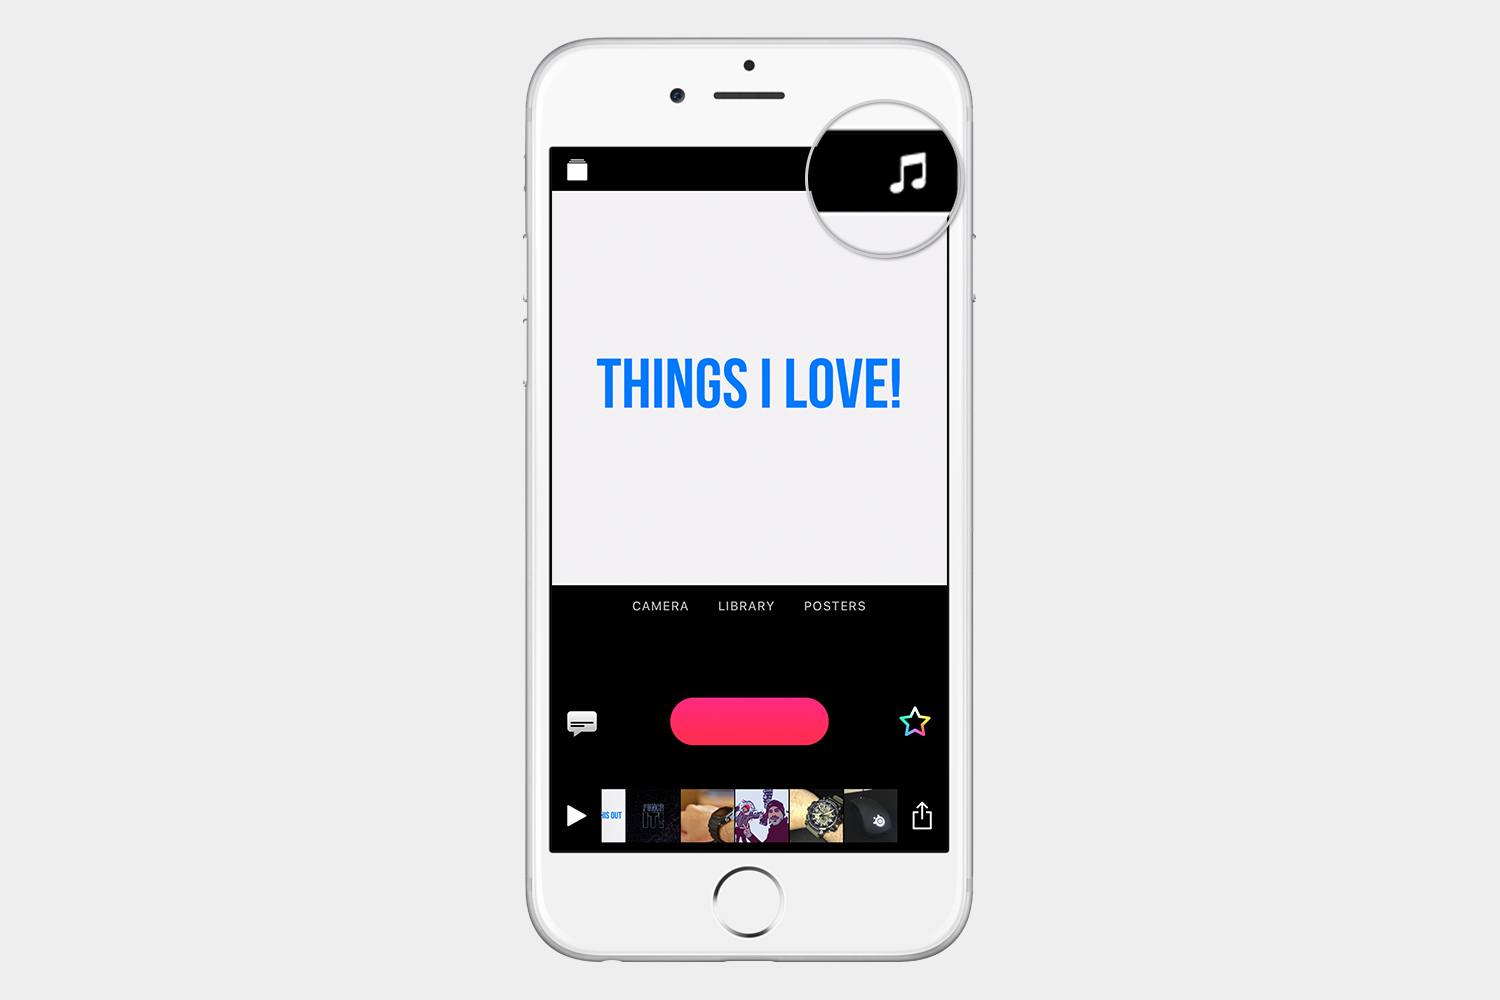
At the top of the app window, you will see two icons. On the very far left you have an icon that looks like a stack of files, and if you tap this icon, you will see all the clips you’ve previously saved. Here, you can also choose to delete them. To delete a clip, just tap on it once and tap the trash icon in the upper right-hand corner.
On the upper right you’ll see the music icon to insert music into your clip.
The best way to understand what all these icons do is to make a short video, so let’s dig in and make a clip to share on social media.
Making a clip
Scenes

If you’re an iPhone X owner, you will see four options. The option on the far left is called Scenes. The iPhone X’s TrueDepth Camera identifies your face and body, cuts it out of the background, and puts you in another scene. It’s like recording a video in front of a green screen. They’re not just two-dimensional flat images, but real environments that rotate 360 degrees. It feels like you’re in that space. They even have a scene from Star Wars that puts you right inside the Millennium Falcon.
Camera (video)
The first thing you should do is tap and hold the red button to record a short clip. For this example, we will say: “This is my favorite mouse.” That was easy! We have our first clip in the timeline.
Camera (photo)

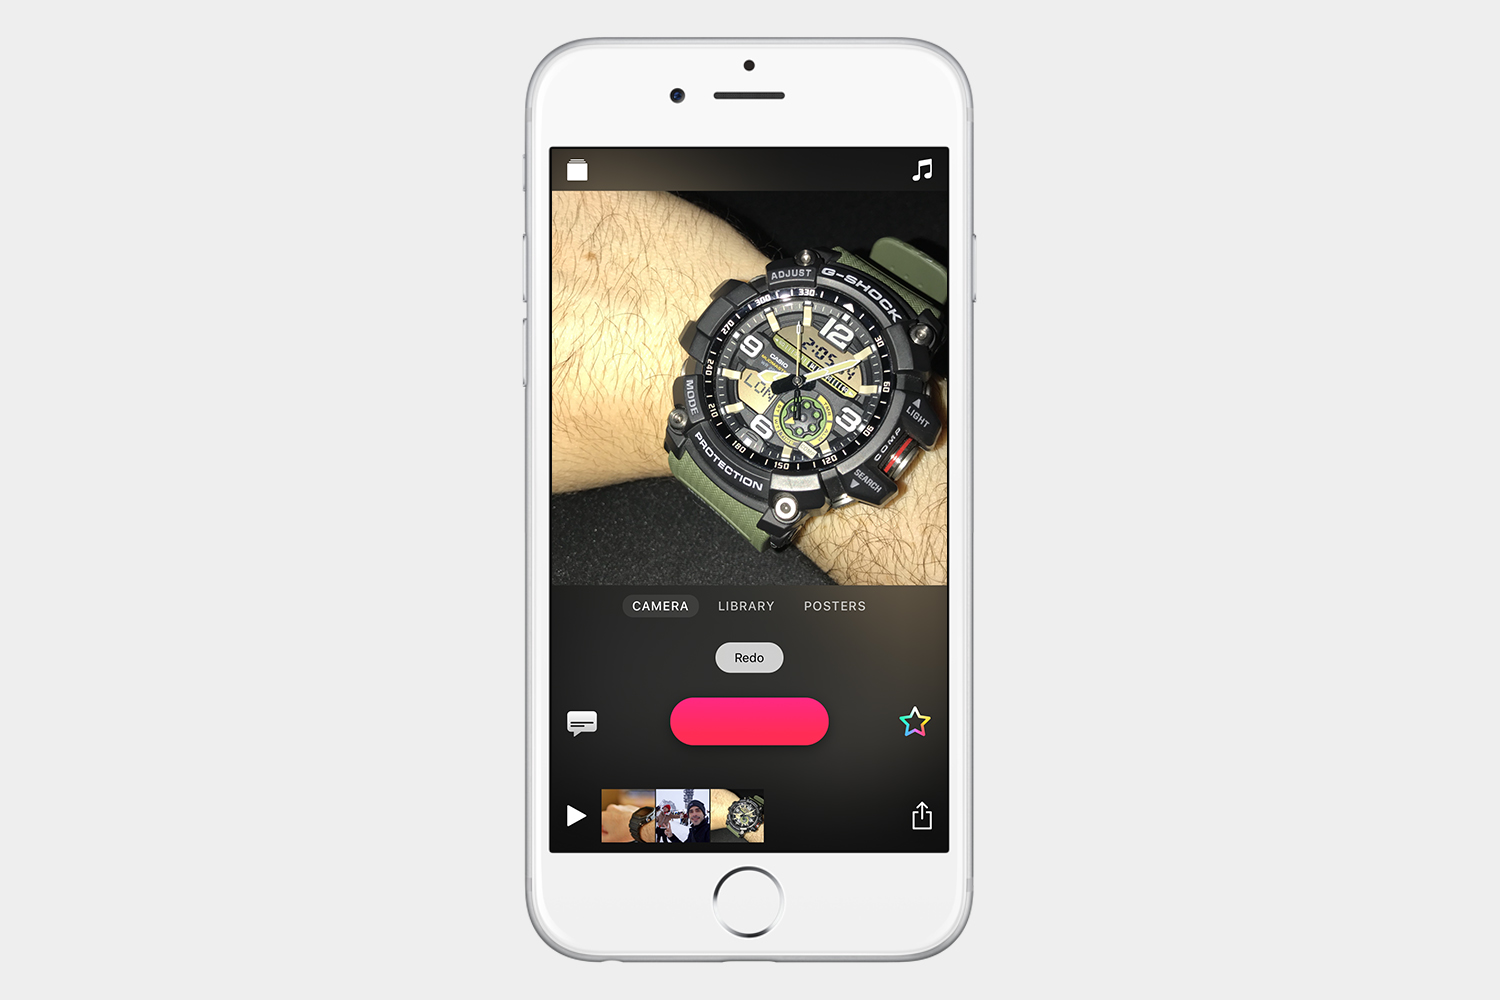
The shutter button icon will let you take a photo, with or without flash, using your phone’s front-facing or rear camera. Keep in mind that the photo won’t be added to the timeline right away, however. After you take the photo, you’ll have to hold the red button to add the photo to the timeline. To do so, hold the red button for five seconds and then let go. The photo should now be part of the timeline, and you can drag and drop these clips anywhere you want to. If you want to take another photo just tap Redo.
Library
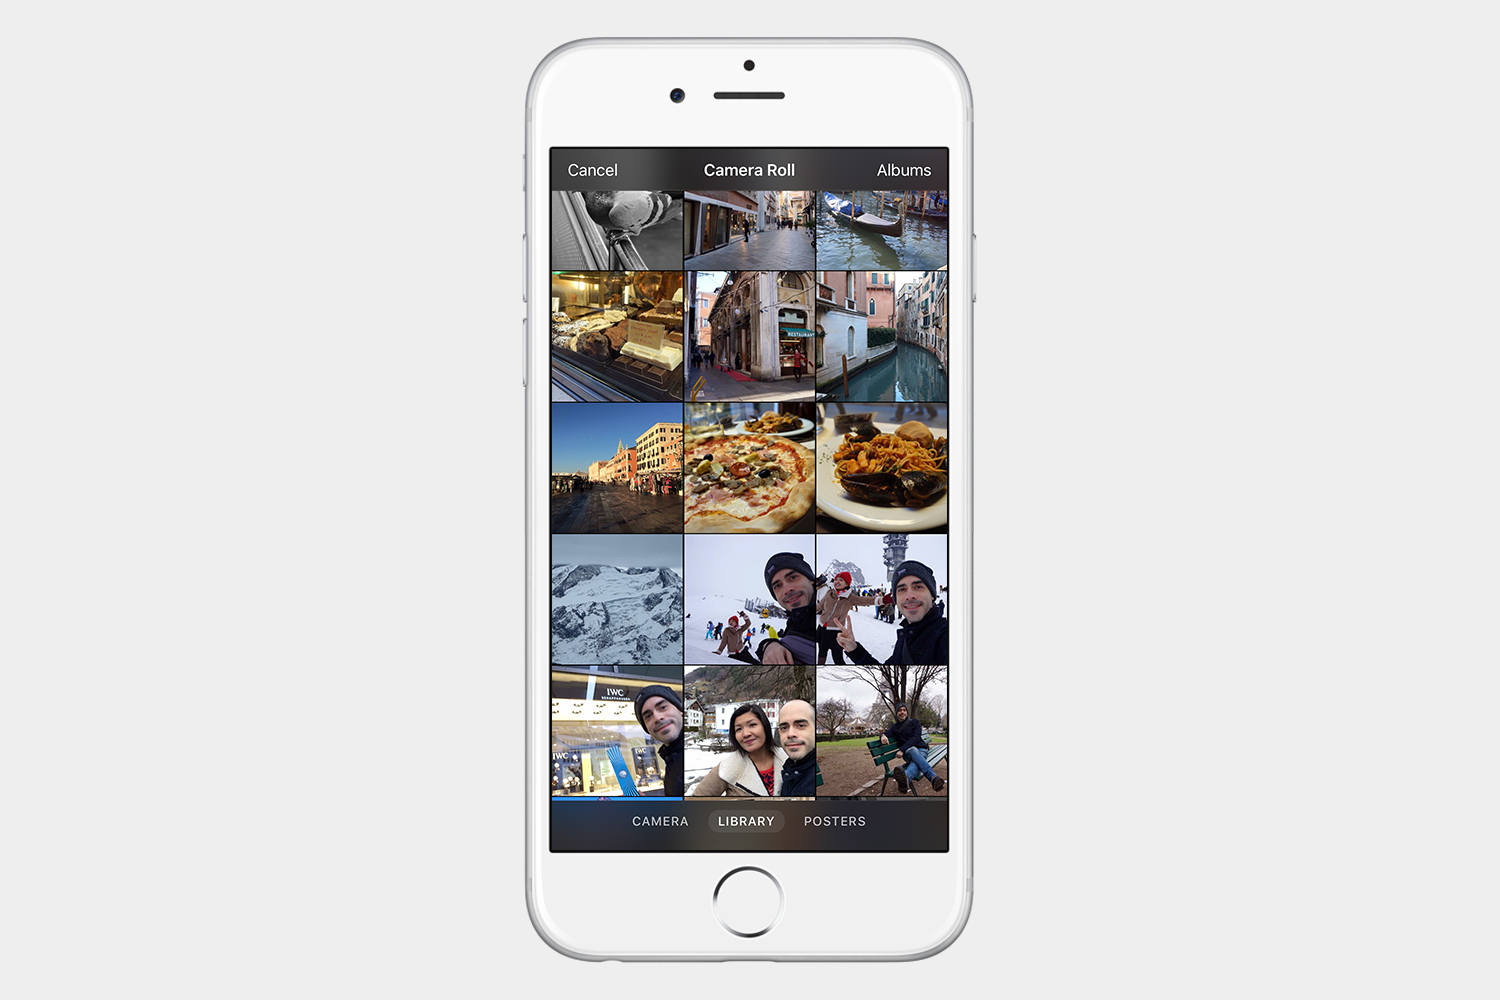

Using the library is very easy, and allows you to make these clips later with videos and pictures you’ve taken during the day. Just like we did before, you select the photo or video that you want to add, and then hold the red button to add it to the timeline. How long you want the picture or video to be is up to you.
Keep in mind that any time you are holding the red record button, you can also talk to add your voice.
Even if you add a video from your library, you can still talk while you’re pressing the red button. If the original video has sound don’t worry, we will show you how to mute it in the next section.
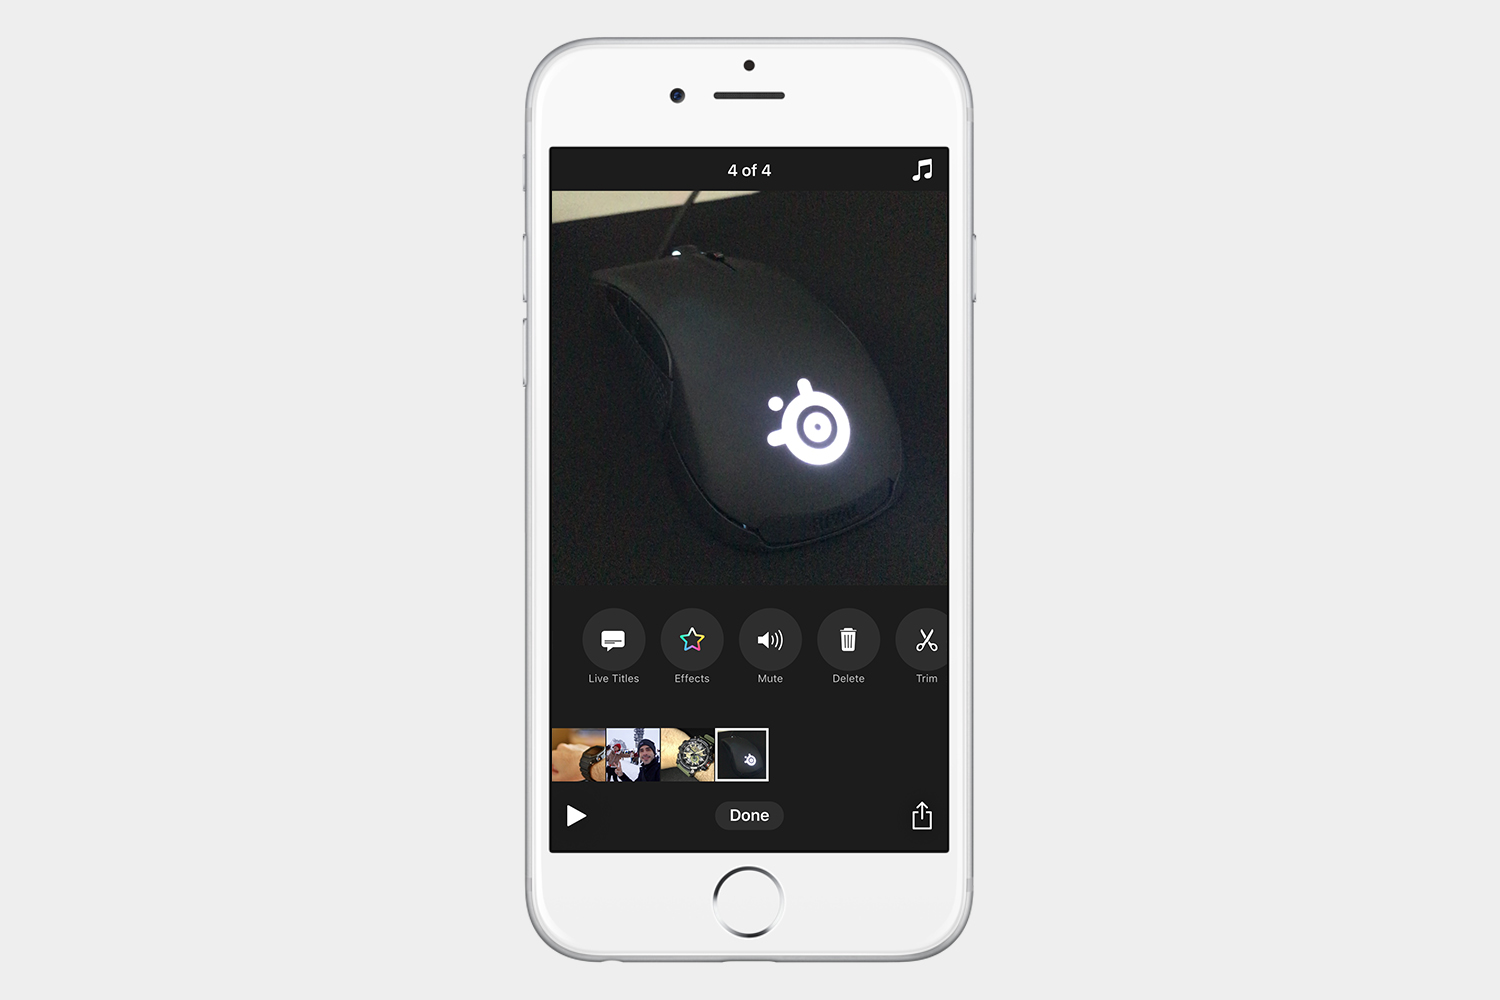
Editing your timeline

Once you’ve added some videos and pictures, it’s time to do some editing. When you tap on each clip, you will see six icons directly above the clips.
- Live Titles icon: This will only work on a clip that has audio. It will listen to what is being said in a clip and overlay the words on top of the clip with various effects.
- Effects icon: Use it to add various filters and emojis.
- Mute icon: Use it to mute the sound of a clip.
- Delete icon: Use it to delete a clip.
- Trim icon: It allows you to cut a clip to your desired length.
- Save icon: It saves a clip directly to your photo library.
Adding effects, filters, and music
As previously mentioned, you trigger editing mode if you tap any of the clips, allowing you to trim, delete, or mute a clip. However, you will also see three icons at the top of the preview, which are live titles, filters, and overlays.
Live Titles
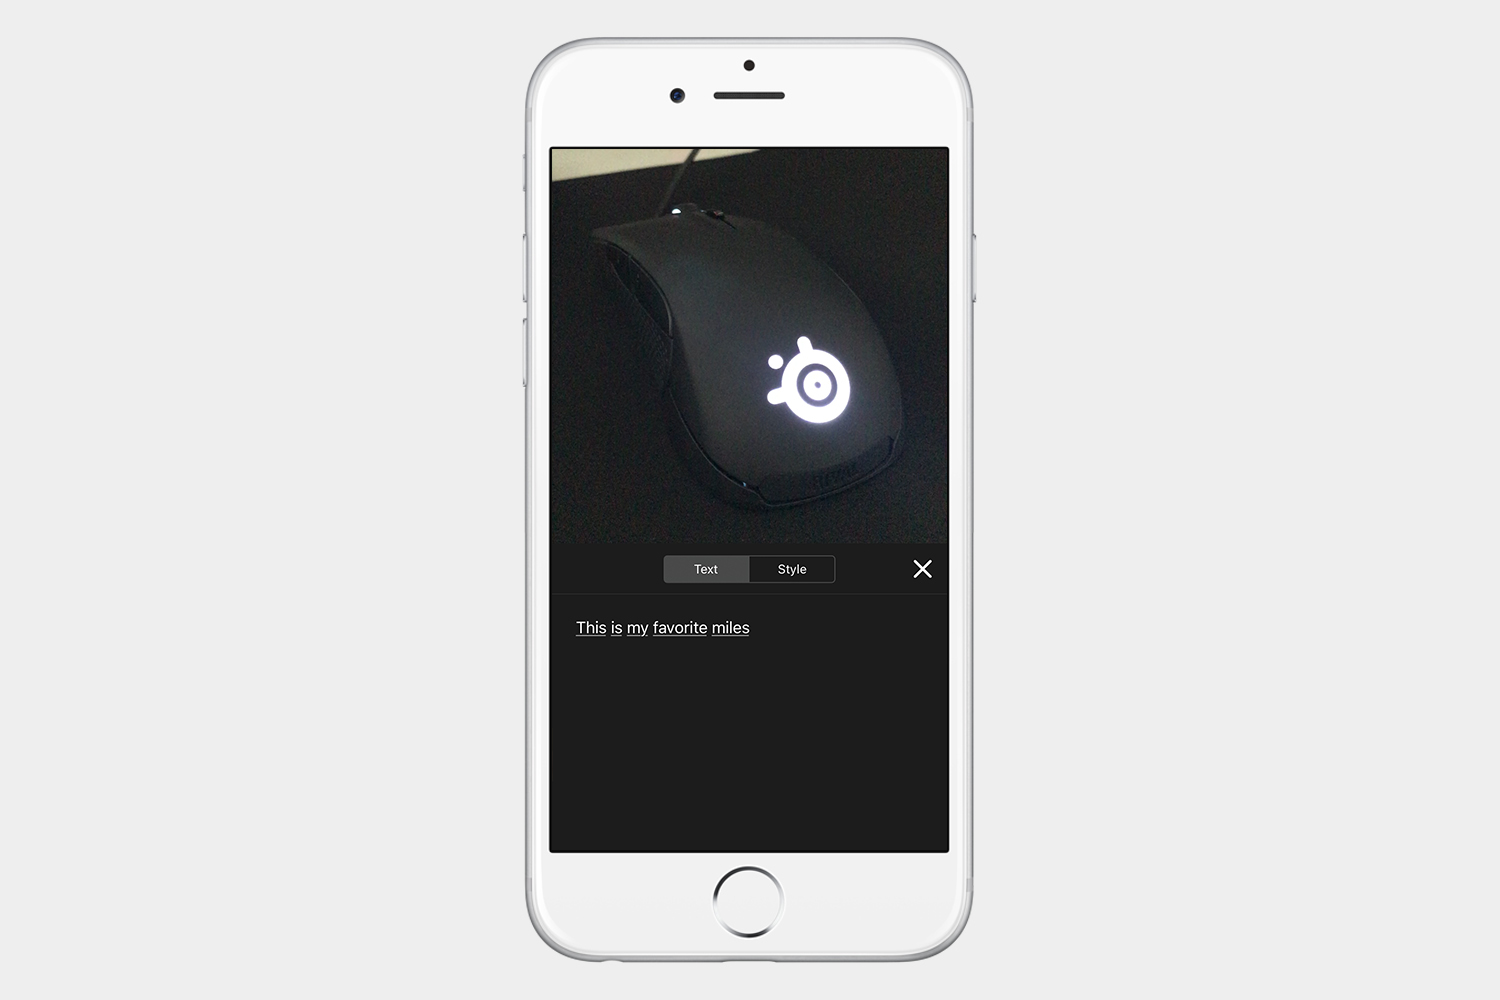

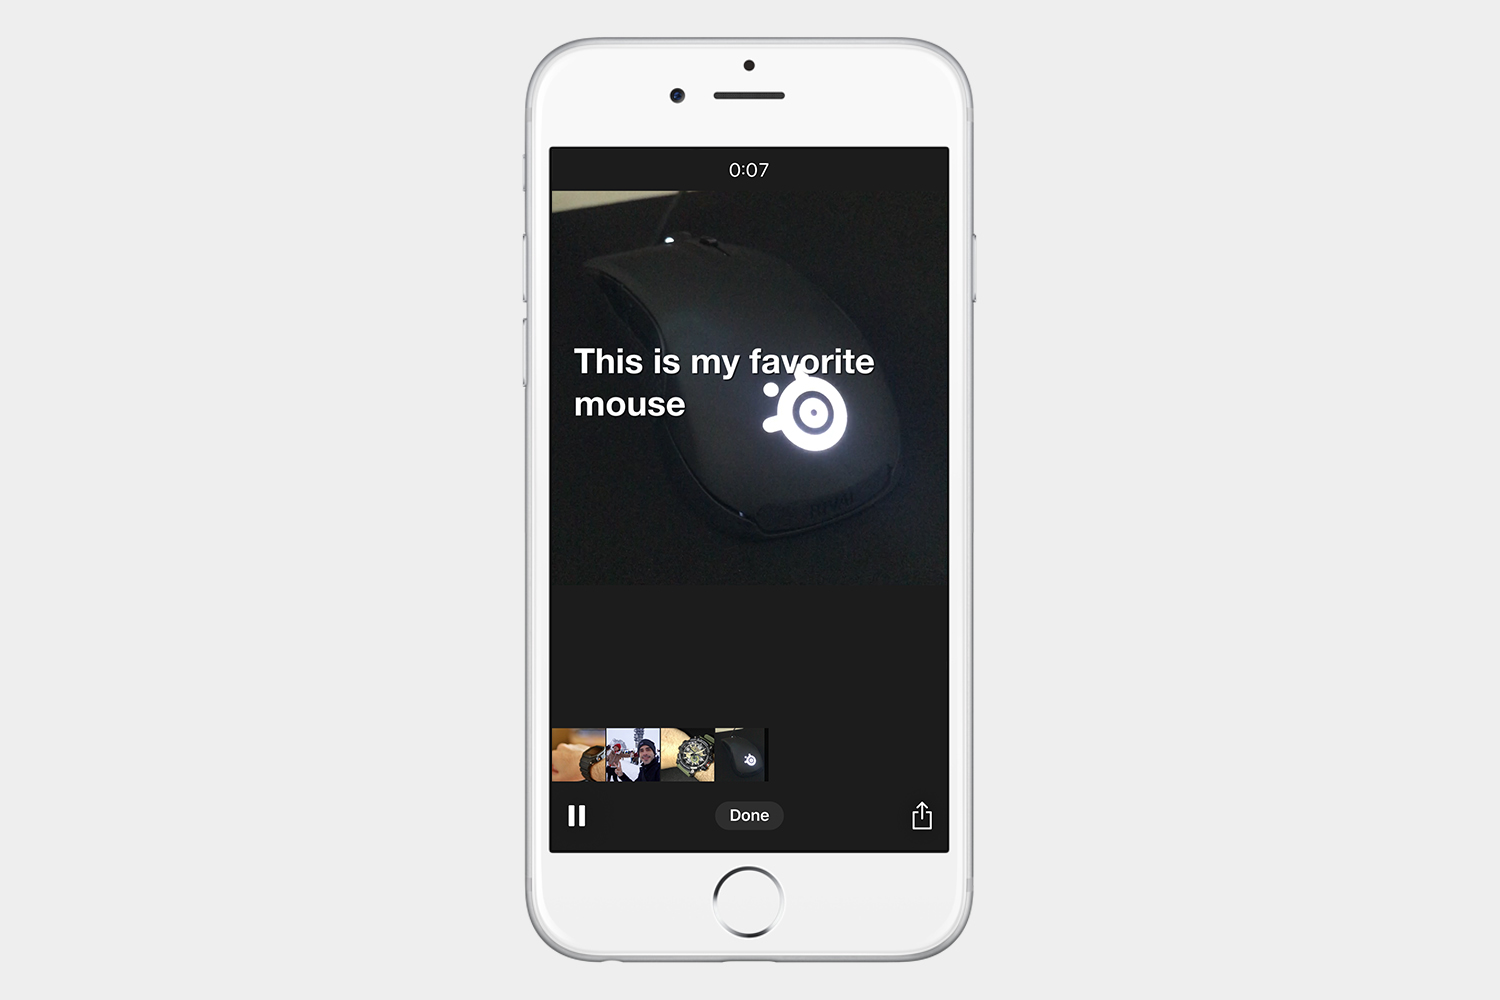
The speech bubble icon is live titles, and it will try to understand what you are saying and write the text as you are speaking. Sometimes it will get it wrong. To edit the text, play and pause the clip, then tap the words in the preview window. This will open a text editor. In our example, Clips misunderstood the word “mouse,” so we simply changed the text.
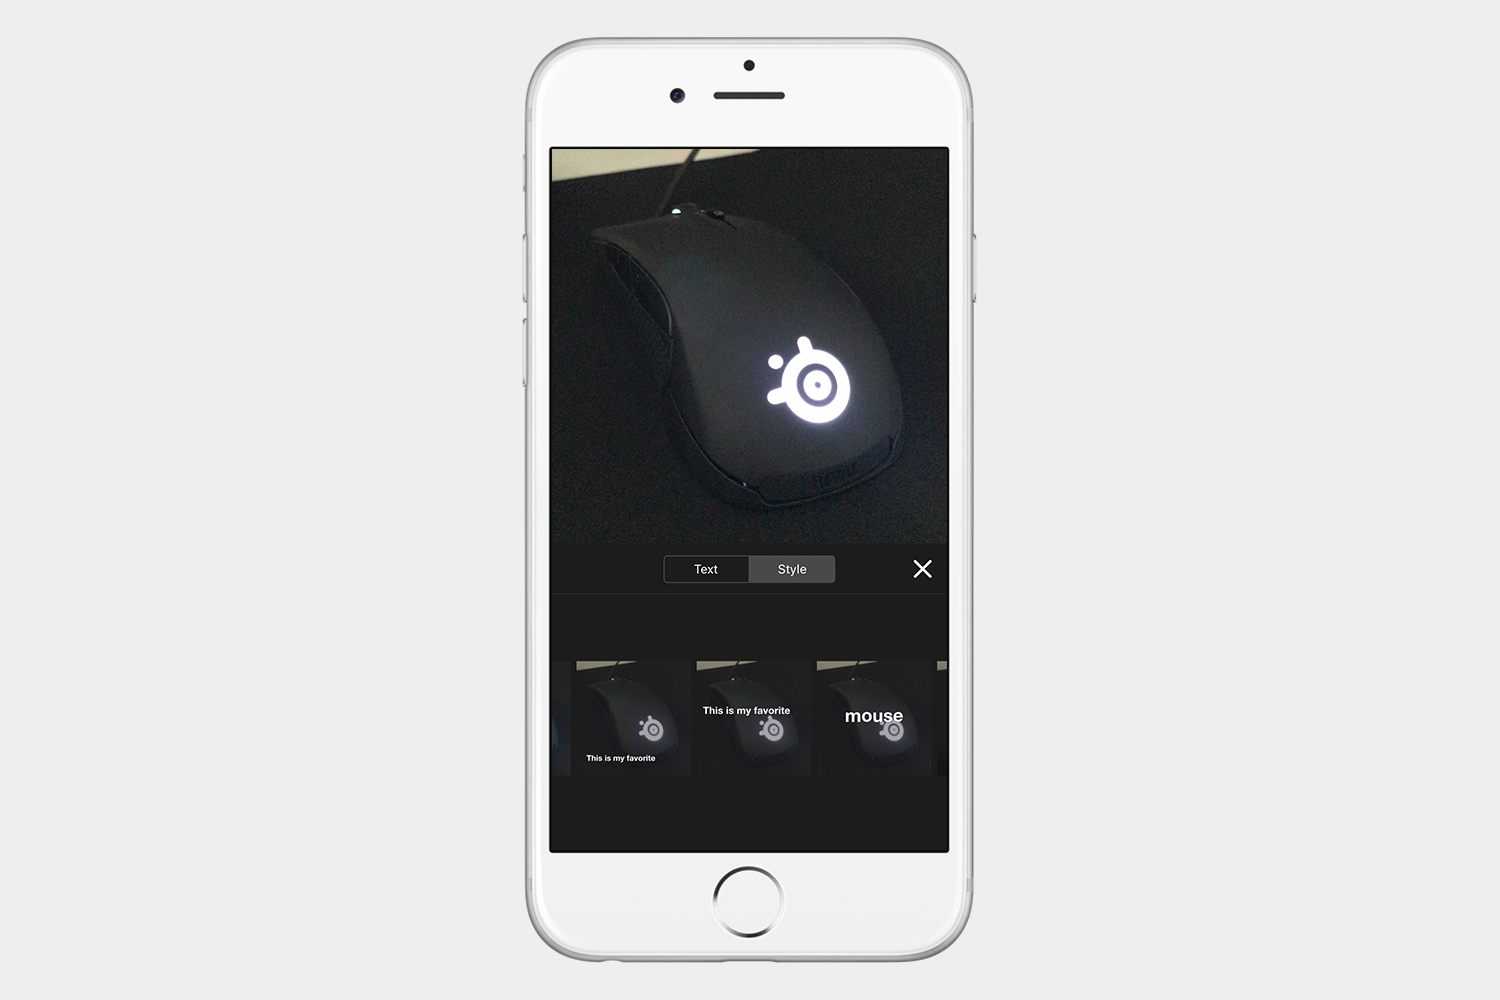
Effects

You can also add filters, labels, stickers, and emojis by tapping the Effects icon. The Effects icon is the icon that looks like a star.
To avoid being repetitive, the one thing you have to keep in mind is that you manipulate labels, stickers, and emojis the same way. You can move them around by using one finger, resize/rotate/move with two fingers, and if you want to delete any of them at any time, just select them once and you will see a circle with an X that you can tap to delete it.
As we said before, Clips is all about that big red button. When you’re finished adding all your stickers, emojis, and labels, you have to press and hold the red button to record them. Otherwise, when you hit Play to watch your clip, none of them will show up.
Also, remember to tap the X on the left to close the Effects panel when you’re finished. That will bring you back to the main window where you can use the red button to record your clip with all the newly added labels, stickers, and emojis.
Effects will work on photos and videos that you already have in your library or the Clips timeline, but if you’re recording something live using the camera, you can also use the effects as you’re recording. Note that some effects are very CPU intensive so you’ll need an iPhone 7 or higher to use some of these effects while you’re recording in real time.
Filters

The filters section has a lot of effects you can overlay over a clip that will alter the colors and even make it look like a hand-drawn cartoon.
Labels

Edit the labels by tapping on the text. When you do that the iPhone’s keyboard will pop up and allow you to type anything you want inside that shape. The more you type, the smaller the text will get to fit inside the shape. When you’re finished typing, tap Apply in the upper right-hand corner.
Stickers

These animated stickers are a lot of fun. Clips includes stickers from Pixar, Disney, Star Wars, and a few other miscellaneous stickers.
Emojis

You will find all your favorite iOS emojis here, just remember that you can move them and resize them as stated above. So have fun with these!
Posters
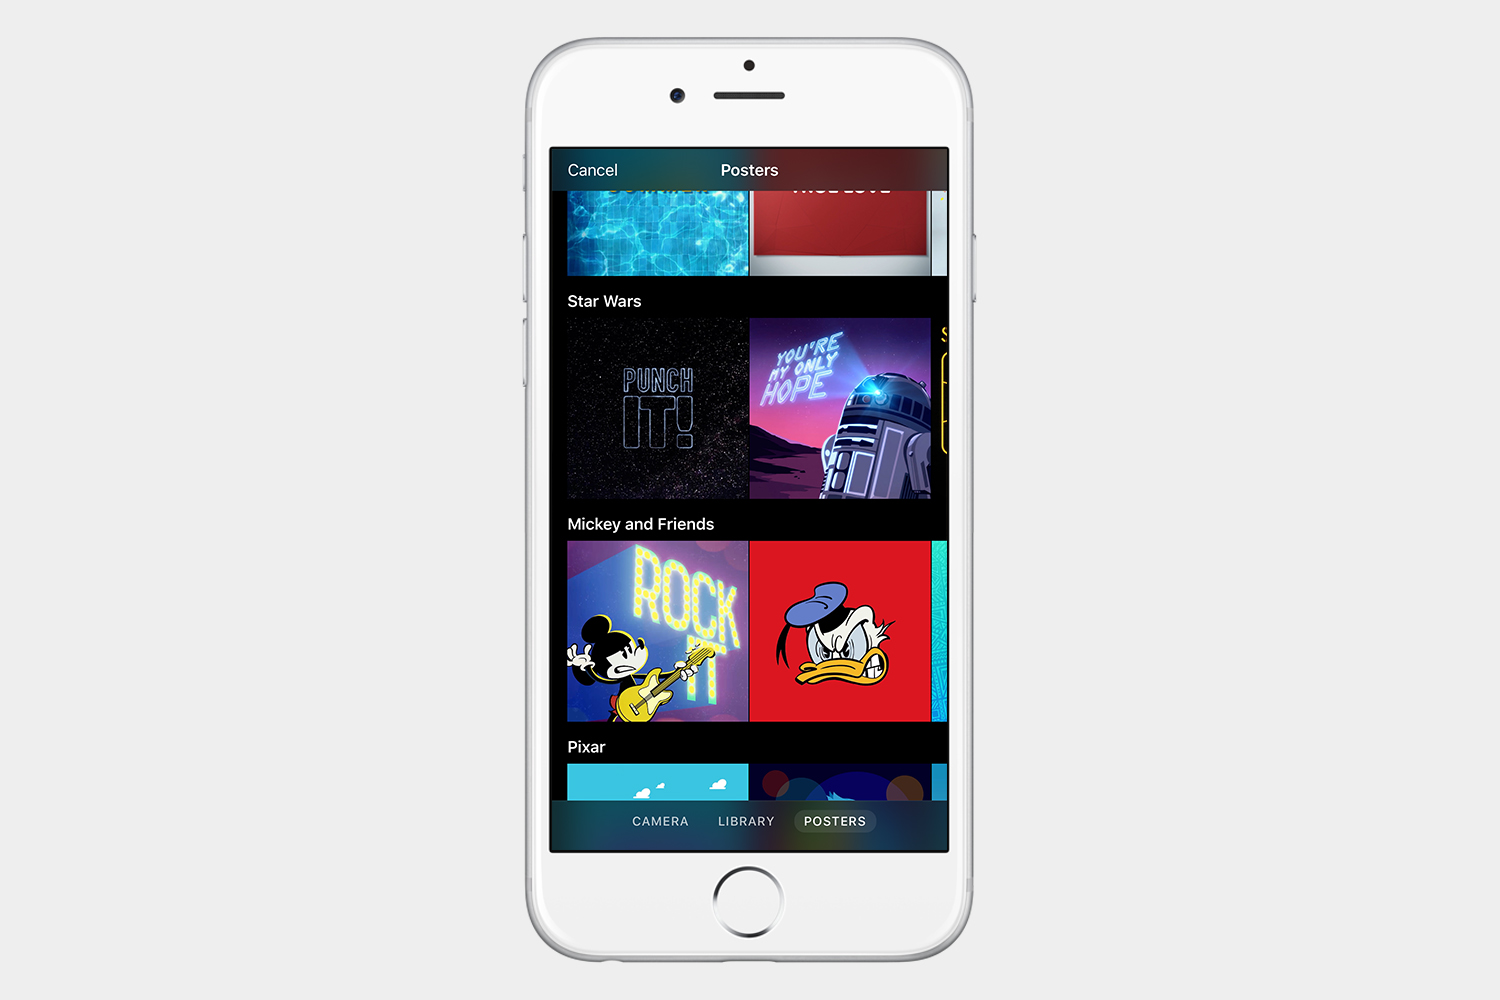
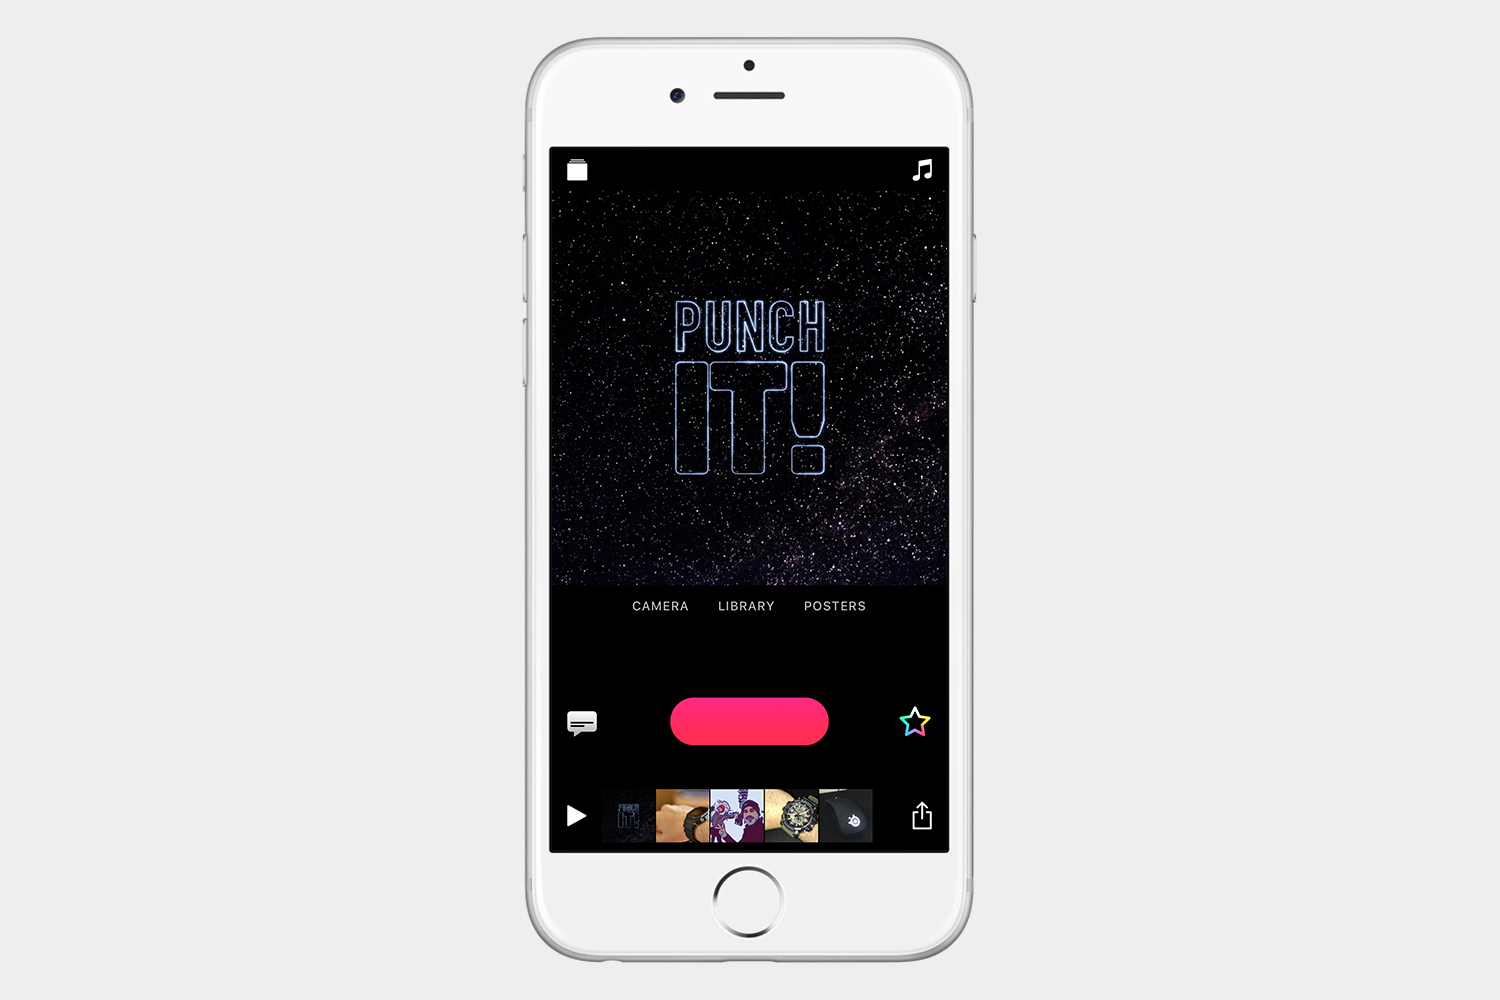
On the main screen, you can choose between Scenes (iPhone X), Camera, Library, or Posters. These posters are like title slides. Some of them are animated, and some are there so that you can change the text and customize your video. To change the text tap on it and your keyboard will pop up. When you finish, tap Apply in the upper right-hand corner.
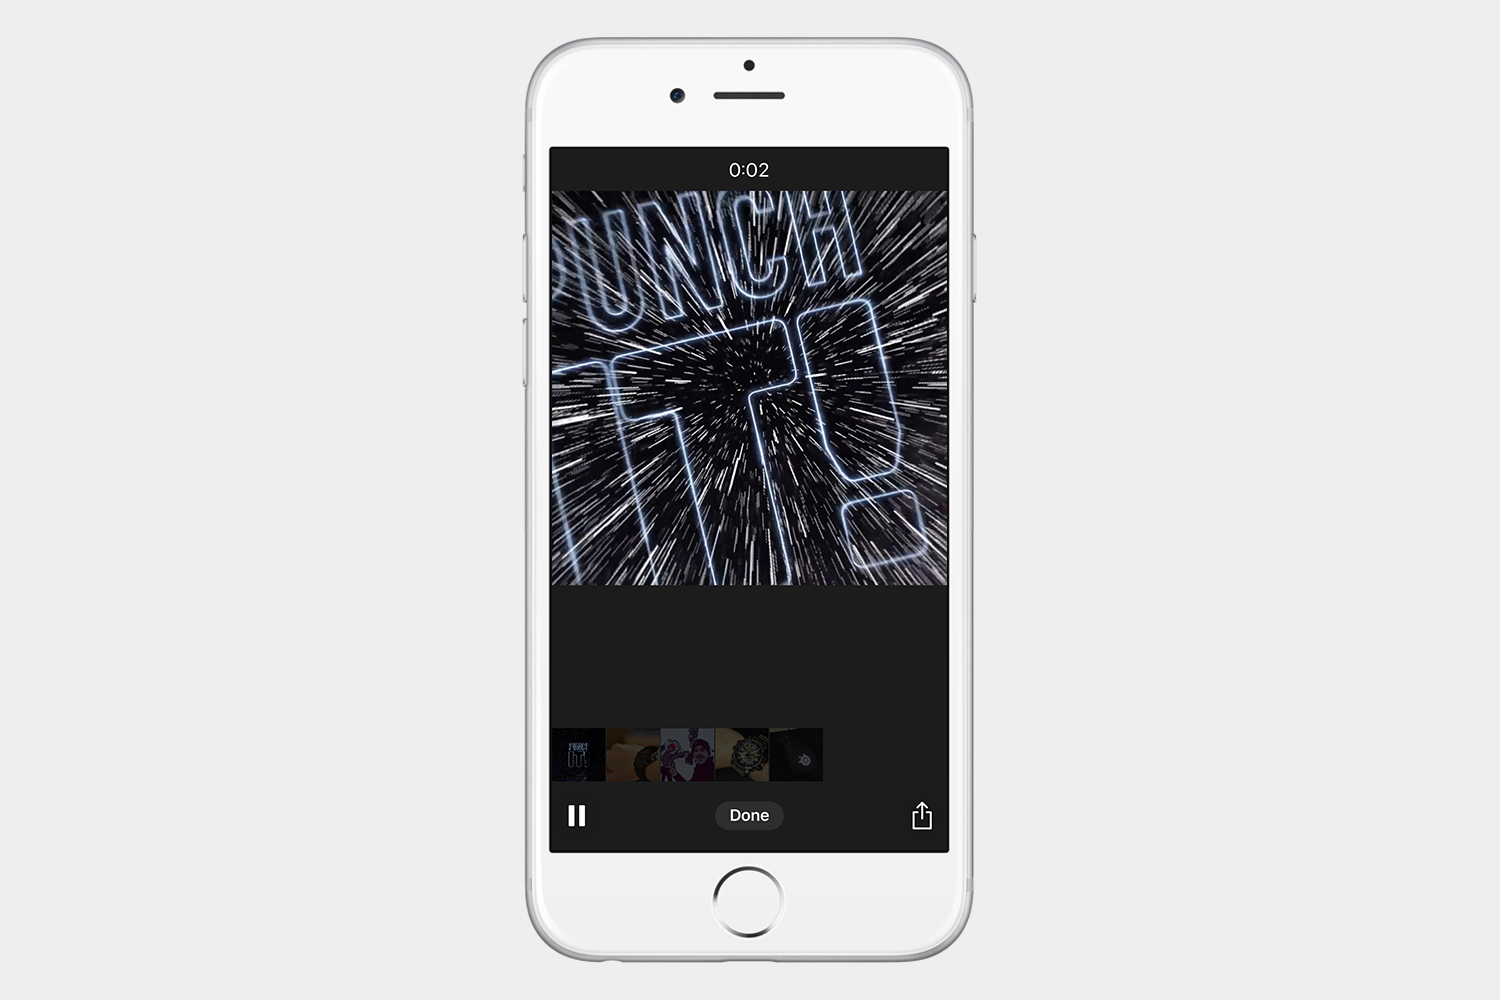
Some posters such as the Star Wars Punch It poster don’t allow you to change the text, but either way, as with everything in Clips you have to hold down the red button to record how long you want the poster to be and Clips will make it part of your timeline.
Adding music
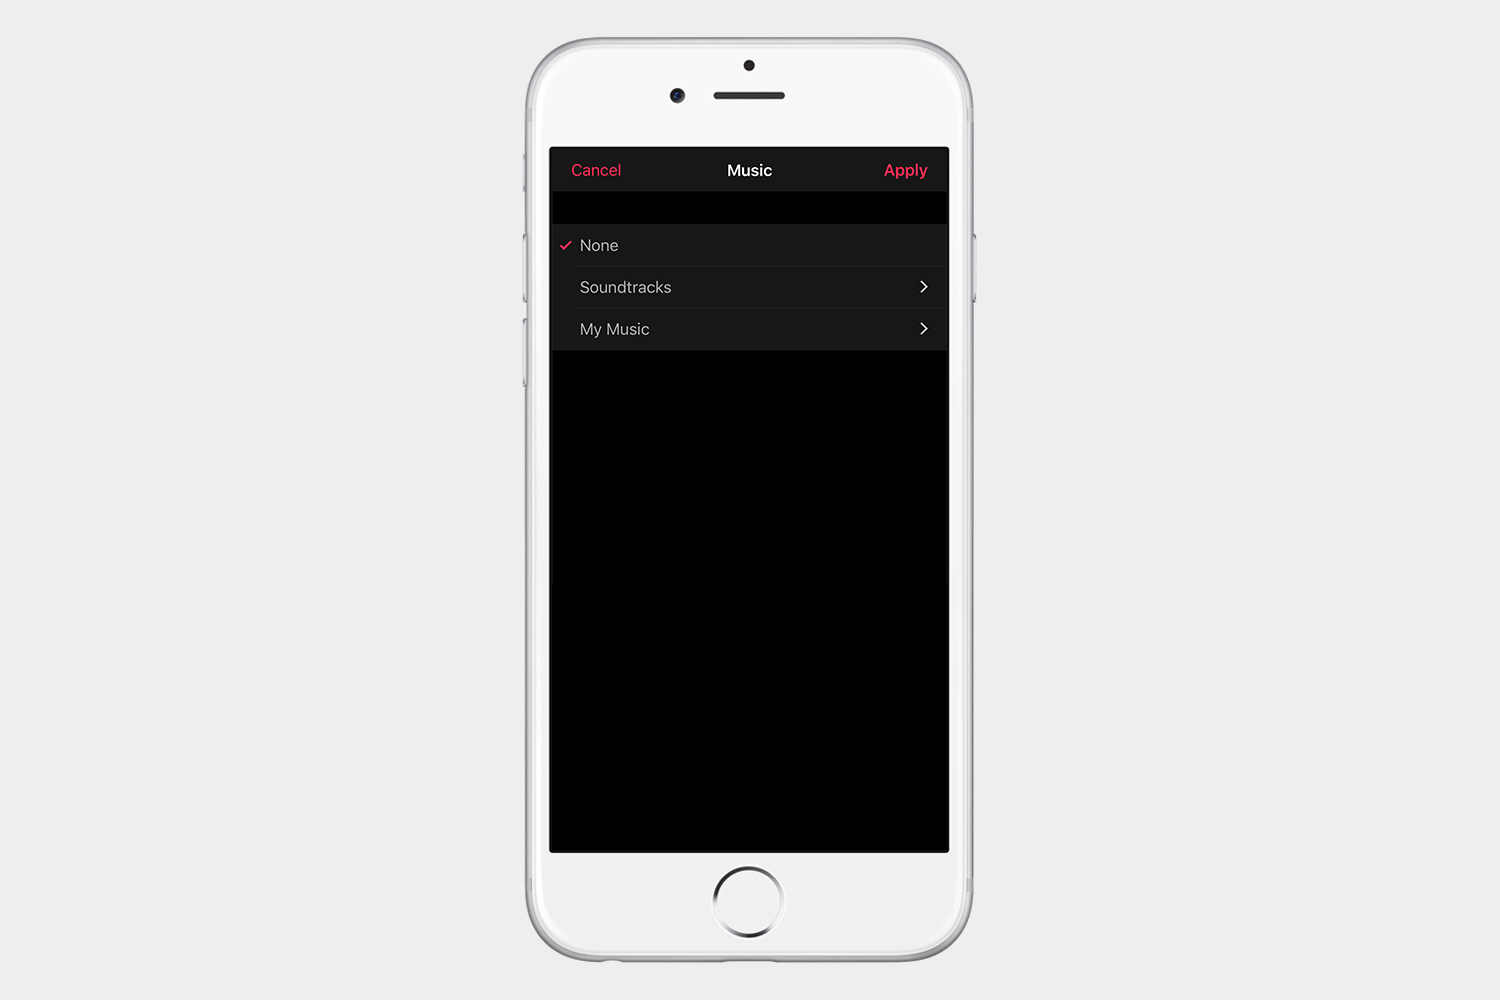
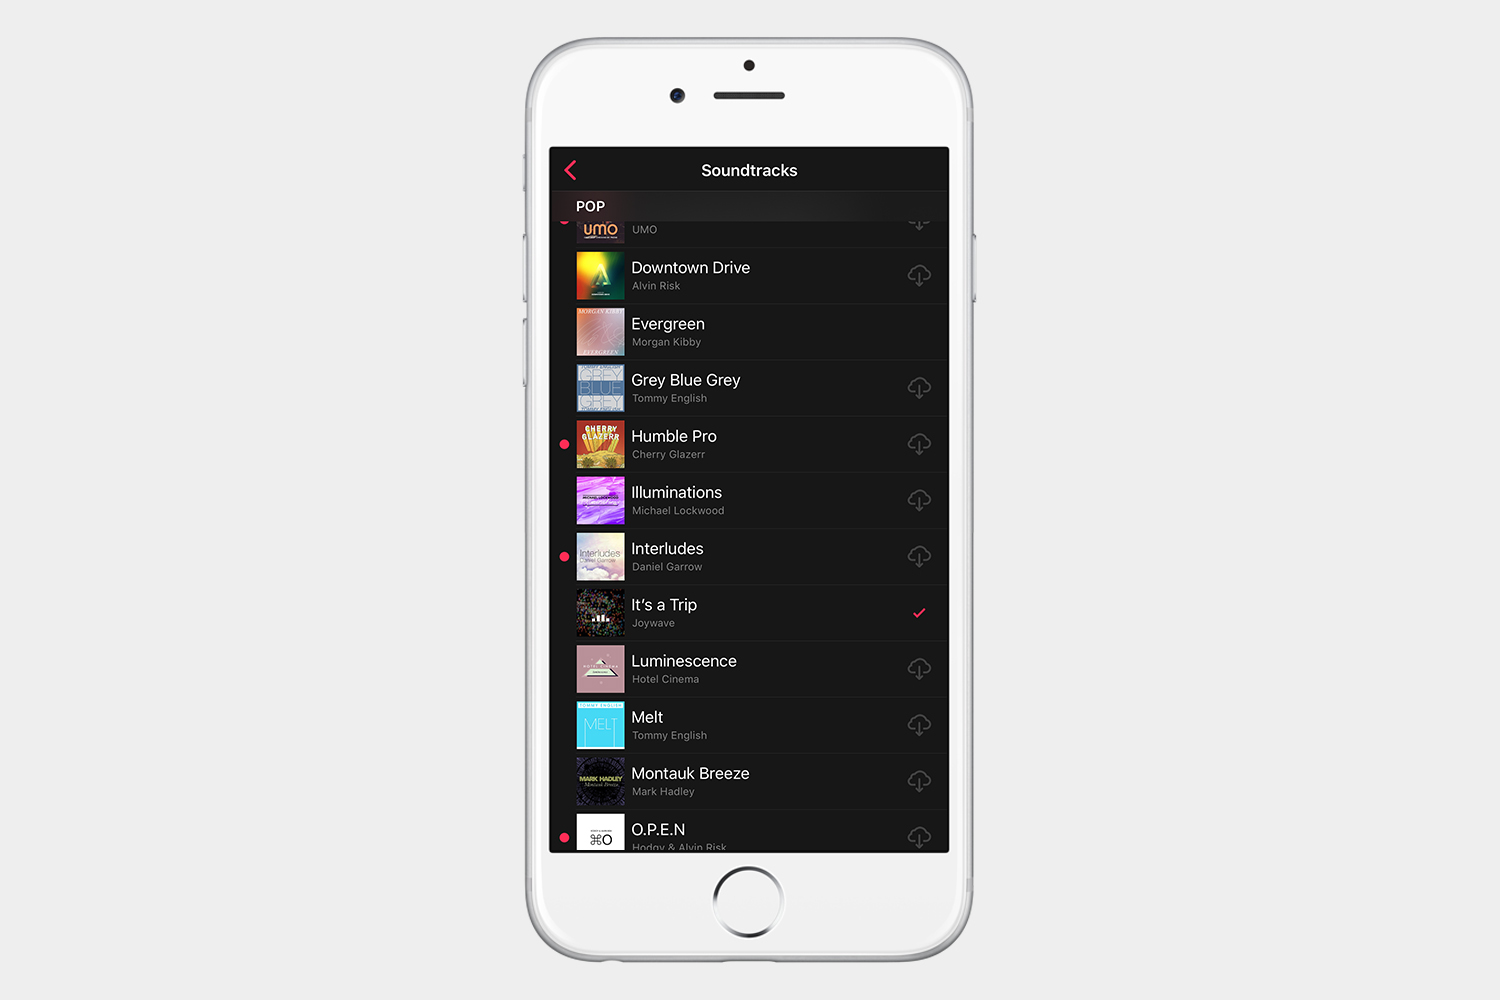
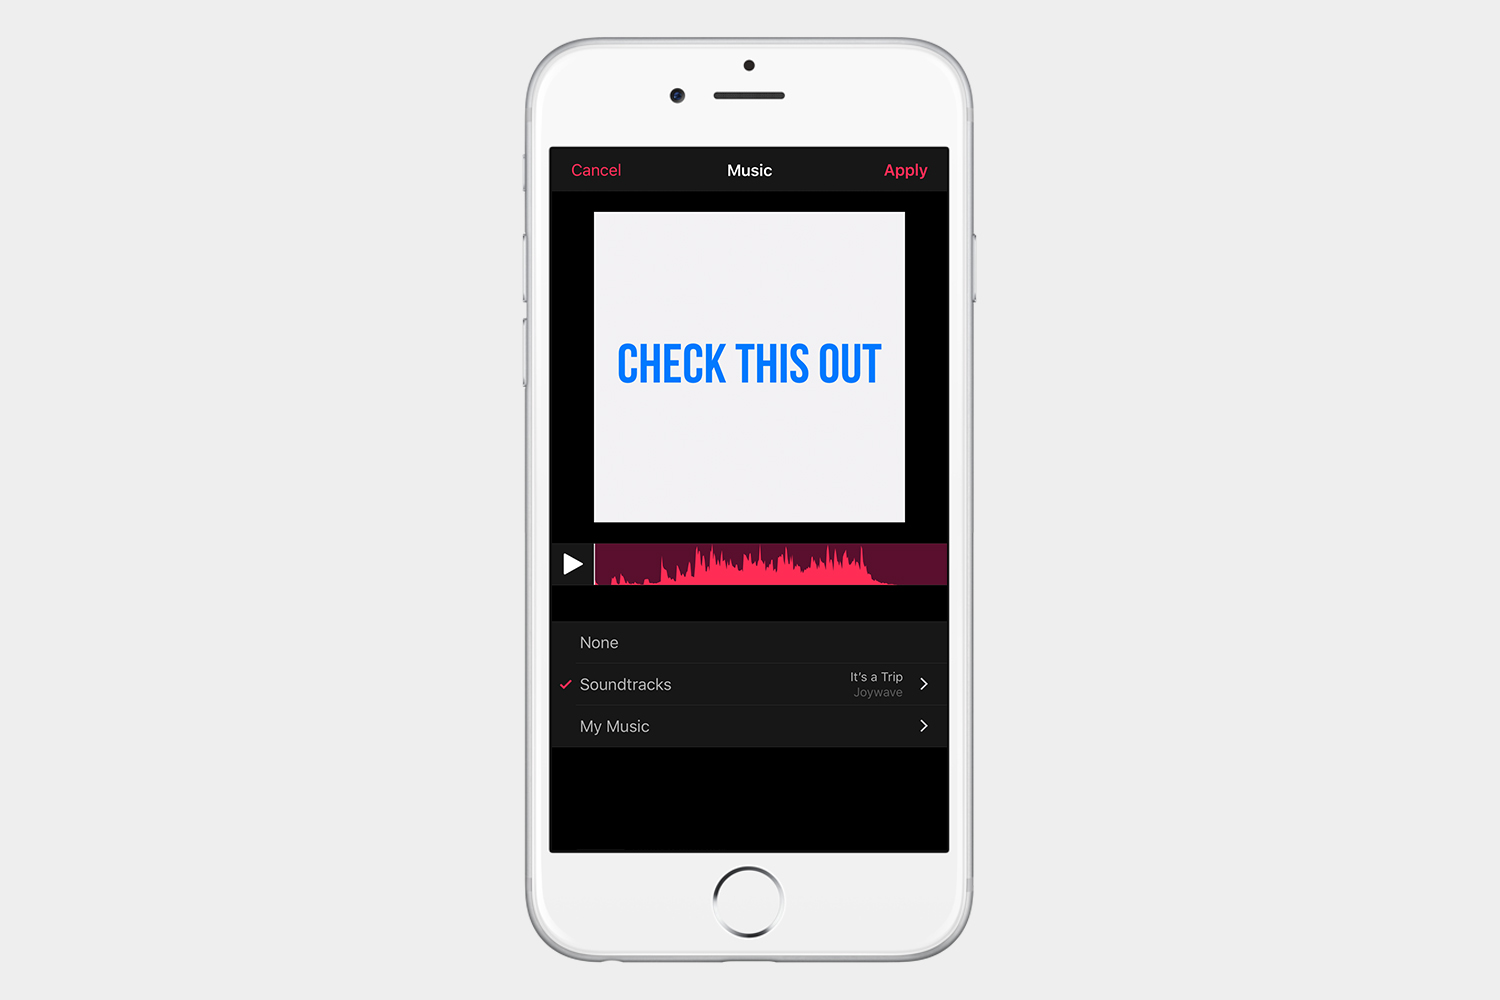
To add music, make sure you’re in the timeline view. Then, select the music icon in the upper-right corner. You can add music saved on your iPhone, but if you’re sharing videos on YouTube and other social media platforms that may block copyrighted music, you can also select one of the many songs available within the app. Once you select a song, play the entire clip to see if you like it. To apply the selected song, simply tap Apply in the upper-right corner.
Sharing your clips
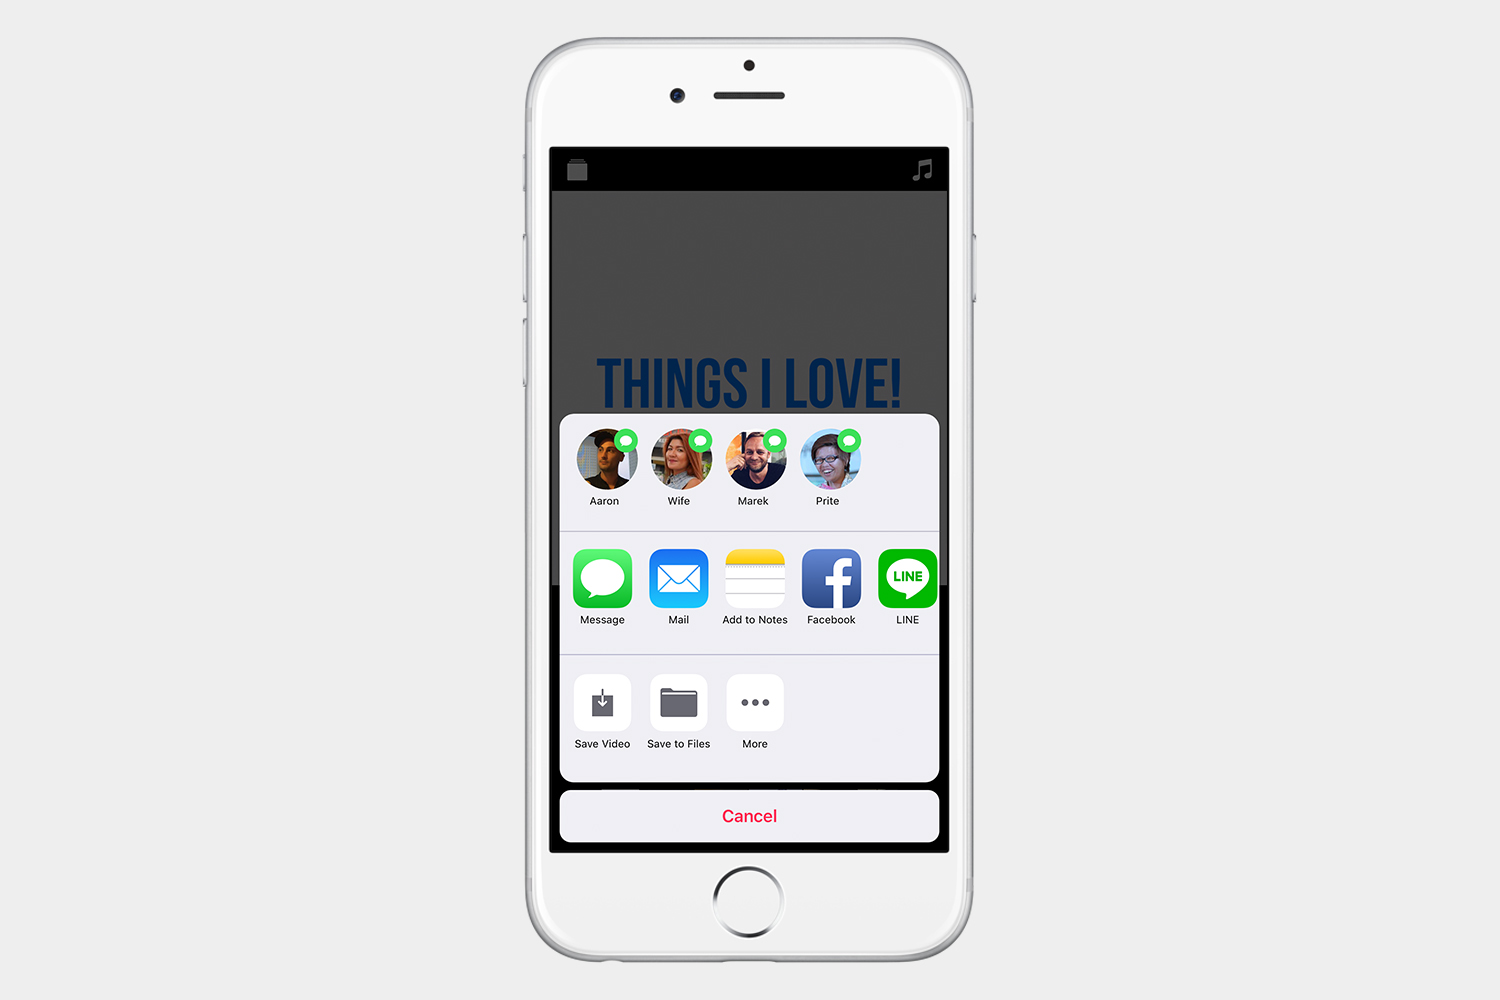
To share a clip, tap the Share icon in the lower-right corner. Here, you can choose to share the clip via Instagram, Facebook, and a handful of other platforms.
Now that we’ve gone through the basics of Apple Clips, you can go out, try it, and share your day with your family and friends.
Are you still on the fence about the iPhone X? Check out our full iPhone X review and how to take the perfect portrait mode selfie with its new TrueDepth camera.
Update: We’ve updated this article to show all the new changes with Apple Clips 2.0.
Editors' Recommendations
- Apple is updating one of the oldest apps on your iPhone
- Apple is adding a brand new app to your iPhone with iOS 17
- What is WhatsApp? How to use the app, tips, tricks, and more
- TikTok’s STEM feed is fine, but it fails to address the app’s biggest issues
- How a tiny social media break can give you surprisingly big health benefits


